Categories

Showing posts with label Yummy. Show all posts

Saturday, 2 August 2014

The Raft

A couple of weeks ago, A and I drove down to Milford-on-Sea to visit my Grandparents. Milford is the most beautiful little town right on the water with a stunning view of the Isle of Wight.


On our last day visiting, we wandered down to a beautiful little bistro called The Raft for breakfast. As soon as I walked in I fell in love...


It was the cosiest, cutest and coolest restaurant I'd been to. The staff were friendly and knew most of their customers by name (including my Grandparents) which was really lovely. 

We had been for supper earlier in the week and had pizzas the size of dustbin lids (sorry I forgot my phone on that occasion!) For breakfast I had the New forest pancakes with fruit compot, greek yogurt and a drizzle of maple syrup.


Pancakes are my favourite indulgent breakfast foods. We usually have them on special occasions (birthdays, family get togethers etc) so this was an easy decision for me. The pancakes were perfectly fluffy and combined with the toppings they were heavenly. YUM! 

Washed down with an Americano on a cute little saucer.


If you live locally, or you are planning a trip down to the coast any time soon, I would 100% recommend The Raft. They are open for breakfast, lunch and supper and have a delicious menu and super friendly staff.

What are your favourite breakfast foods?!

M x

Monday, 28 July 2014

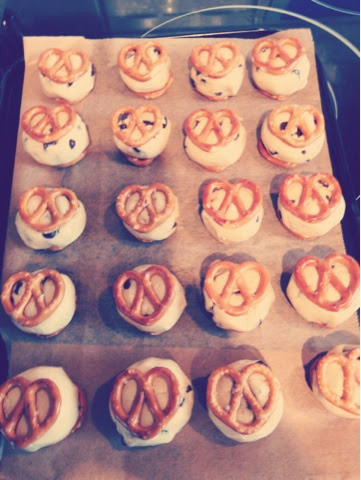
Cookie dough pretzel bites

I'm back!

Having neglected my blog for the last month, I now have a lot of posting to do.

The last month has been super crazy but now the dust has settled, I can finally give my blog a little TLC.

I want to share with you this ridiculously delicious, easy and downright naughty recipe I discovered on Sally's Baking Addiction... Cookie dough pretzel brownies..


Yes, you heard right. Salty crunchy pretzels, with a soft cookie dough and dipped in sweet chocolate.

Okay, stop, just writing this is making my salivate.

If you haven't yet discovered Sally's blog... Get over there now! She posts the most amazing recipes and I felt that this one was too good not to share. It's so easy you don't even need to turn the oven on, so if you're a baking novice, this is the recipe for you!

For the full recipe and instructions, click here (I promise you won't regret it)... For a little sneak preview, keep scrolling...


Keep going...


Dribble...


Let me know how you get on!

M x

Wednesday, 21 May 2014

Strawberry Roulade

Roulades/Pavalova's are definitely in my top 3 desserts.

That combination of soft, crunchy pavalova with whipped cream and fresh berries is pure heaven...


They remind me of summer evenings spent with family at my Grandparents. It's funny how many memories I have linked with food (says something, huh?!)

Roulades are fab because they're gluten free and despite the cream, pretty light. They're a perfect summer dessert, but let's be honest... I don't really need to sell them to you!

I must say this isn't an example of one of my best roulades, however I thought I had to share the recipe with you anyway because it just tastes too friggin good.

For this super delicious summer treat, you will need:

5 Egg whites
275g Caster sugar
50g Flaked almonds
250g Strawberries
300ml Double cream (whipped)

Pre-heat the oven to 200degrees (fan) and line a 33cm by 23cm baking tin with parchment.

In a clean bowl (make sure it's spotless, if it's damp or has anything in it, your egg whites won't whisk properly) whisk your egg whites until they hold soft peaks.

Add the sugar a little at a time until it's completely combined and the mixture is really stiff.

Pour the mixture into your prepared tin and smooth, sprinkle evenly with the almonds and bung in the oven for 8 minutes. Once the pinger sounds, turn the heat down to 140 degrees and bake for another 15 minutes.


Once cooled, turn the meringue onto a large sheet of baking parchment and spread with whipped cream, then arrange the strawberries.


Tip Don't spread the cream right to the edges, once you fold it the cream will escape a little and you don't want it all leaking out!

Now for the fun part, using the baking parchment, tightly roll your meringue into a swiss roll shape and voila!


Scrummy... Now dig in!

What are your favourite summer desserts?

M x


Wednesday, 30 April 2014

Some berry yummy Froyo

I have to admit that in the past I have not been a froyo fan. I tried it a couple of times last year and didn't really like it. It tasted far too fat free for my liking, and just... boring.


I can usually take or leave ice cream, but when i want it, I want it, and a lot of it.


I seem to have been having more ice cream cravings than usual recently, So decided it was time to give the froz yog another try (third time lucky, eh?). Umm, best idea ever. I can't believe what I've been missing! I feel like I have wasted so many years without froyo and I have to make up for lost time.


Inspired by a recipe I found online, I adapted this raspberry frozen yog recipe to suit my own taste. I like the sharp taste of berries so I didn't add any sugar, however if you have a sweeter tooth just add icing sugar to taste. Basically, you can do whatever you like. It tastes so friggin' good and I want to try out millions of flavours.


You want to know the best bit? It's super healthy. In fact it's so healthy that you can eat it for breakfast. Or lunch. Or as a snack. Or just whenever you god damn want.


So go on, give it a whiiirlll.


To make two generous servings of raspberry frozen yogurt you will need:

250g Raspberries
2 tbsp Raspberry jam
250g Greek yogurt
 

Bung the raspberries and jam into a pan and stir over a medium heat for 5 minutes.


Sieve the mixture to get rid of the seeds (you could leave these in if
you like) and mix in the yogurt.

If you want to add sugar, now's your chance! Add to taste, otherwise leave it out for a sharper flavour.


Whisk mixture together and pour into an ice cream maker. Get that baby mixing until you have a smooth consistency, put into a container and freeze.


If you don't have one... Don't fear! You can pour the mixture straight into a container and freeze for one hour. Remove from the freezer, beat until the mixture is smooth and put back. Freeze for 30 minutes and then beat again. Repeat the freezing and beating until it has a smooth consistency.


Now, tuck in... with a shovel.


Have you got any good frozen recipes worth a try?

M x

Thursday, 17 April 2014

Oh My Gaaad Creme Egg Brownies

Okay guys, I'm beyond eggcited to share this simply amazing brownie recipe with you.


You seriously need to make these. Like, now.

I figured it was finally time to jump on the creme egg brownie wagon, you know, as it's Easter and all.

Being the super amazing girlfriend that I am, I whipped up a batch of these bad boys for A, since I'm venturing back to the Country for Easter.

I found this recipe on the Nottingham Post website this afternoon and within half an hour I was in Sainsbury's buying the ingredients. I marched home and got to work with A checking the progress every 5 minutes.

I suddenly feel the need to stock up on Creme Eggs before they sell out. I don't think I can wait until next year to make these again!

So.... Let's get cracking (okay, enough of the egg jokes now)

You will need:

185g Unsalted butter
185g Plain chocolate (High quality kids!)
85g Plain flour
40g Cocoa powder
3 Eggs
275g Golden caster sugar
6 Cadbury's eggs (halved)


Begin by pre heating your oven to 160 degrees. Melt the chocolate and butter together in a bowl over a pan of boiling water. Don't let the bowl touch the water as it will cause the contents to burn.


Once melted, put to one side. Whisk the eggs and sugar together with an electric whisk (or get those muscles going beating by hand) for about 3-8 minutes until the mixture has a milkshake-like consistency.


Add the melted chocolate, stir, then mix in the flour and cocoa powder until you have a big gooey chocolatey bowl of heaven.


Pour the mixture into a 20cm square baking tin. I use silicone for brownies because they are so easy to turn out and you don't need to line with parchment. Place in the oven and bake for 15 minutes.


Now for the fun part! Grab your creme eggs and chop in half. Not gonna lie, I did struggle with this a bit and got into a bit of a sticky mess (excuse to lick my fingers!). I rather enjoy the rustic look and these not looking completely perfect though.


Once the brownies have been in for their first stint in the oven, pull them out and evenly place the creme egg halves all over the mixture. Chuck em' back in the oven for another 5-10 minutes and you're done! I would suggest leaving them to cool before chopping them up, but I don't blame you if you're too impatient to wait.


Just look at that... I'm salivating.

These are easy to make, impressive and the perfect naughty treat for Easter.

What are your favourite Easter bakes?

M x

Saturday, 12 April 2014

Super Tasty Turkey Burgers

I love a good burger. The combination of juicy meat, gooey melted cheese and sauce is to die for.

Looking for a healthier alternative to the standard Cheese and Bacon burger (which is oh so good, but oh so unhealthy) I stumbled across a recipe for chicken burgers which I have adapted, swapping the chicken for turkey and adding in a few extra's.

Not only are these low fat and super tasty, they're also really quick to make.

Now you can have your burger and eat it too.

For four, good sized turkey burgers you will need:

500g Turkey mince
1 Small white onion (finely sliced)
2 Medium size cloves of garlic (crushed)
2 Heaped teaspoons of Paprika
Cheddar cheese (As much or as little as you like)
Salt and pepper
Guacamole
Sour cream
Tomato salsa
Roll of your choice

Place the mince, onion, garlic, paprika, salt and pepper into a bowl and mix. Not with a spoon, roll up your sleeves and get your hands dirty. This is the fun part! Squelch around in that bowl until all of the ingredients are combined.


Next, add the cheese. The cheese really is optional, when I made these I split the mixture in half and made mine without and A's with. I didn't really measure the cheese, just kept grating until it covered the rests of the mixture, I was pretty generous!


Once combined, divide the mixture into 4 patties and place on a tray. Grill for about 8-10 minutes on each side, until the juices run clear and the burgers are steaming in the middle.

If you want to make your own guacamole, you can do so by throwing 1 avocado, 1 tomato, 1.5 cloves of garlic, a squeeze of lemon and some salt and pepper into a blender. Blitz until it reaches desired consistency. This is so quick, easy and delicious. You can create this mouth watering dip whilst your burgers are cooking and use the left overs for nachos (if there is any left!)


Now it's time to prepare the throne for your burger! Grab your roll and slice down the middle (I used a gluten free seeded roll, but you can use whatever you like) add a few lettuce leaves and smother in guacamole. Add your patty, a few generous dollops of sour cream and tomato salsa et voila!

That's one tasty burger fit for a Queen (or King, A hoovered his up before I'd taken 2 bites!)


Monday, 7 April 2014

Gluten Free Fudgy Raspberry Brownies

As someone who suffers from a Gluten intolerance, I try to find gluten free alternatives for my favourite recipes.

In my opinion, raspberries and chocolate go hand in hand. They are a perfect combination, sweet, rich chocolate with a contrast of sharp berries. YUM.

Here is a recipe for gluten free brownies. Okay, so they may be gluten free, however they are packed full of butter, sugar and (of course) chocolate... So in other words, extremely unhealthy. But hey... We all need a treat now and then!

Using ground almonds as an alternative to flour, these tasty treats do have a slightly grainy texture, however... Still completely and utterly heavenly.

For a batch of gooey, rich, berry brownies, you will need:

225g Dark chocolate
225g Unsalted butter
200g Caster sugar
3 Eggs (beaten)
150g Ground almonds
100g Fresh raspberries

Begin by heating your oven to 170 degrees and greasing a square brownie tin.

Put the butter and chocolate into a heat proof bowl and melt until combined over a pan of boiling water. Stir frequently to prevent the mixture from burning.


Take the glossy mixture off the heat and put to one side, stir in the sugar. Leave to cool slightly before you add the eggs, otherwise it will cause them to scramble.

Once cooled, add the eggs and ground almonds and combine.


Stir in the fresh raspberries and pour the mixture into your tin.


Bake in the oven for 30 mins, or until the top is slightly crusty. Leave to cool and then slice into squares.


Go and enjoy with a cuppa. Or if you can't wait for the kettle to boil, by themselves... They're that good.

Tuesday, 1 April 2014

There's something fishy going on...

I love fish...Grilled, poached, fried, raw, as an entree or as a main... you name it. Fish is just the best.

Along with my love for fish is my interest in trying new things and experimenting with recipes, putting my own twist on things.

Here is my take on healthy, gluten and guilt free salmon fishcakes. No butter, no oil, no bread crumbs and no frying.
Just fresh, colourful veg with delicious salmon... A perfectly light and healthy supper.

These fishcakes are so versatile, you can really put in whatever you fancy. Don't like spring onion? Add some peas... Don't like salmon? Use cod. Not fussy? Use them all!

Super tasty and can be made in advance. Go on try it, I'm sure you won't be disappointed.

For 6 fishcakes you will need:

300g Salmon fillets
350g Sweet potato & Butternut squash mix (chopped)
2 Spring Onions
1/4 Red onion
3 Medium cloves garlic

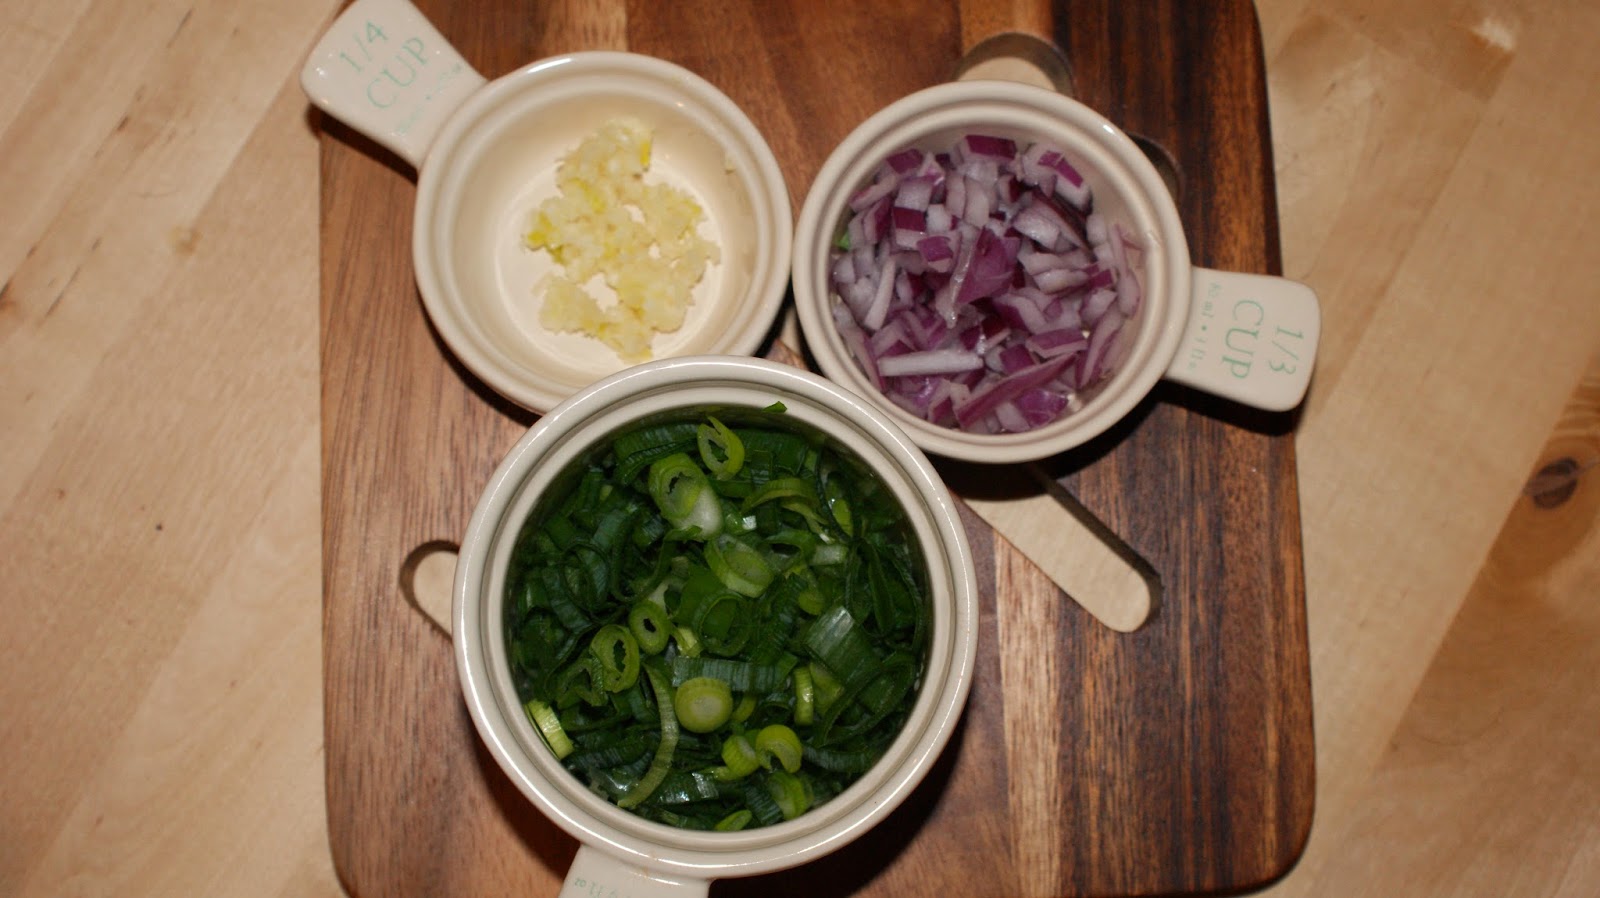
Start by boiling lightly salted water for the potato and squash mix. In the mean time, finely slice your spring onions and red onion, crush up that delicious garlic and put to one side.


Add the potato and squash to the water and boil for about 10-15 minutes until soft; drain and give it a good mashing. Steam or poach your salmon until just cooked, then flake with a fork.


Mix all those tasty, aromatic ingredients together until you have a bowl full of fishcake mix ready to be portioned. Now it's time to get messy. Using your hands, split the mixture into six and mold into fishcake shapes. Go on, get stuck in


Look at those. Flakey pink salmon with yummy onions and garlic wrapped in a big sweet potatoey, butternut squashy cuddle. My mouth is watering already.

Place onto a greased tray and bake in the oven for 15 minutes on 180 degrees, turn over and bake for another 15 minutes.

To serve, chuck on a bed of salad, with mixed veg, in a bun... The world is your oyster. Enjoy.